 ← PostgreSQL Blog
Oracle Linux 8.5 Installation on VM
Oracle Linux 8.5 Installation on VM
Create a machine by opening the virtual machine and clicking new.

On the screen that opens, select the name of the machine and in which folder you want to save the machine. Since we have installed Oracle linux 8.5, its type will be linux and the version will be oracle. You can continue by clicking Next.

You can choose the memory size of your machine on the screen that opens.

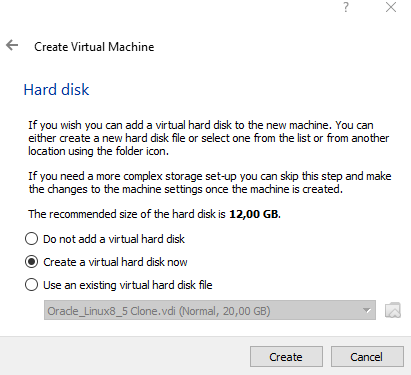
The option to create a virtual hard disk now is selected and click the create option to continue.
Hard disk file type is selected VDI in the first option and continue.

In this step, the Dynamically allocated option is selected and continued.

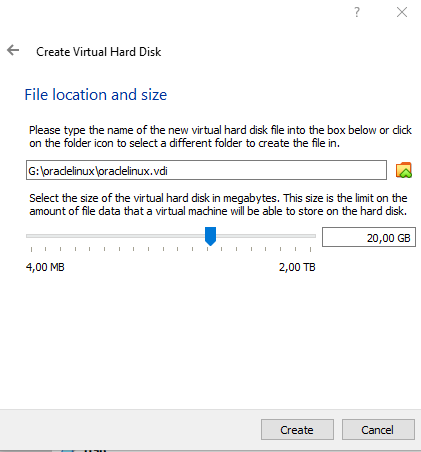
The size is determined for storage. Then the machine is created.
The machine is started by clicking Start.

Continue by selecting the previously downloaded Oracle Linux 8.5 iso file. If you haven’t, you can download https://yum.oracle.com/oracle-linux-isos.html from this site. After downloading, you can select it and press start.


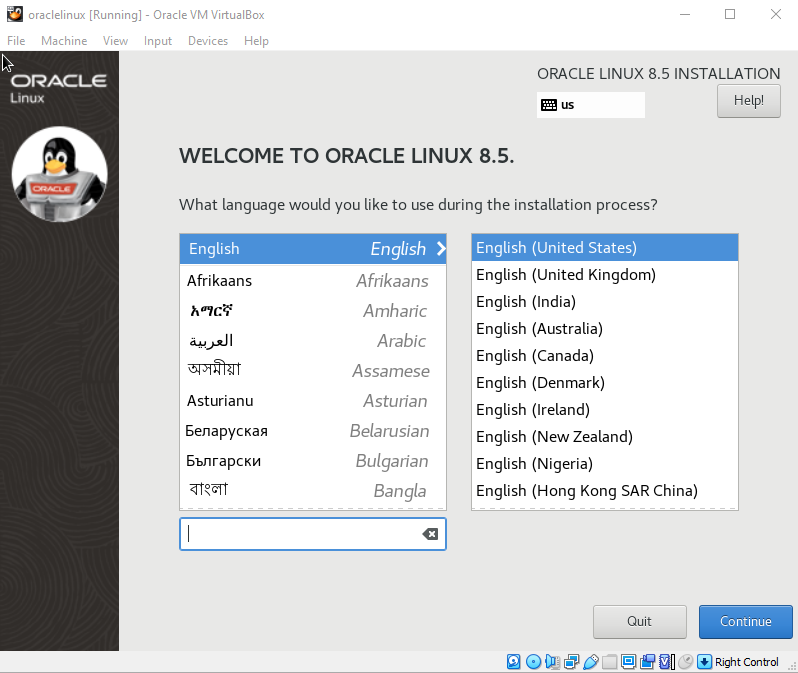
The language for this machine setup is English. Continue by selecting the desired language.
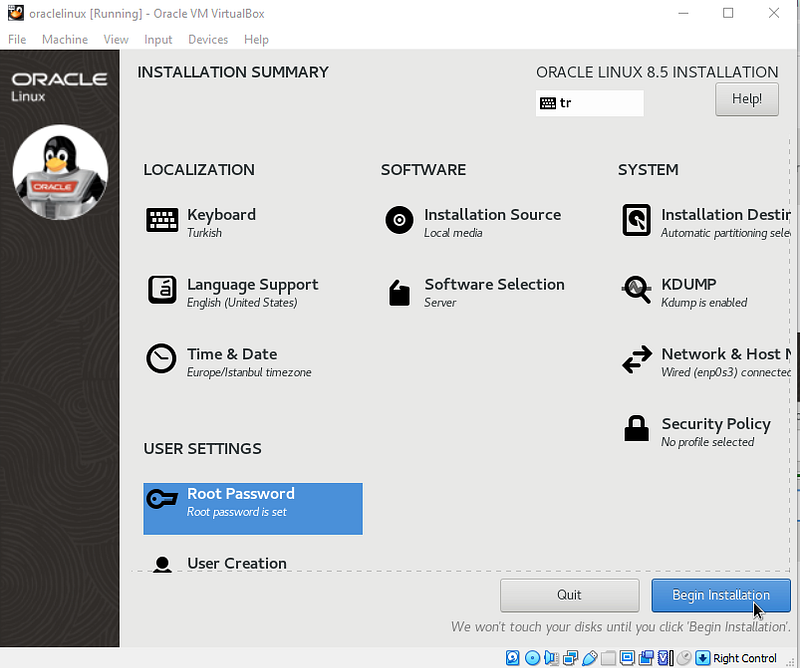
After clicking the Continue button, the following screen will appear. The settings of the components that appear on this screen must be made one by one.
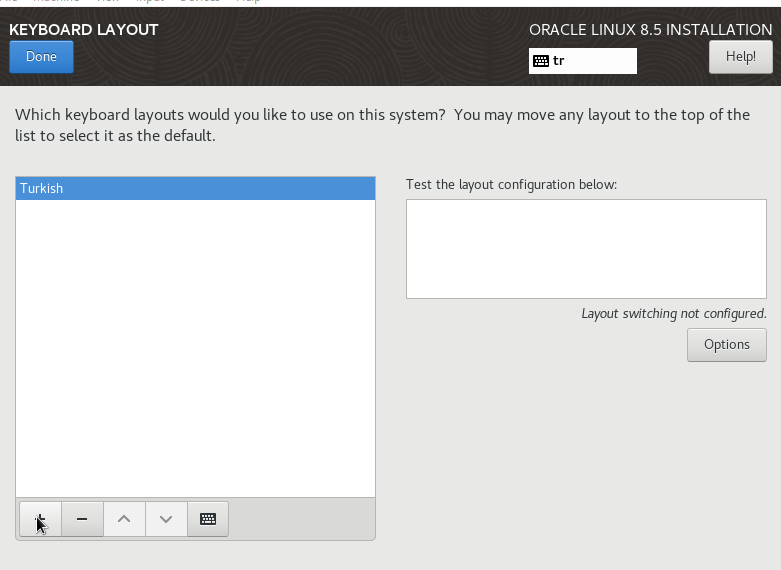
Keyboard selection from Keyboard Layout is made in Turkish.
Europe Istanbul is selected by selecting Date & Time. Also, installation source and language support can be default

If a GUI is desired, the server with gui is selected, but since I don’t want a gui, I click Done after choosing the following options from the Software Selection section.

In the Install Destination section, the disk partitioning option is selected. If desired, disk partitioning is done manually by selecting the ‘I will configure partitioning’ option.
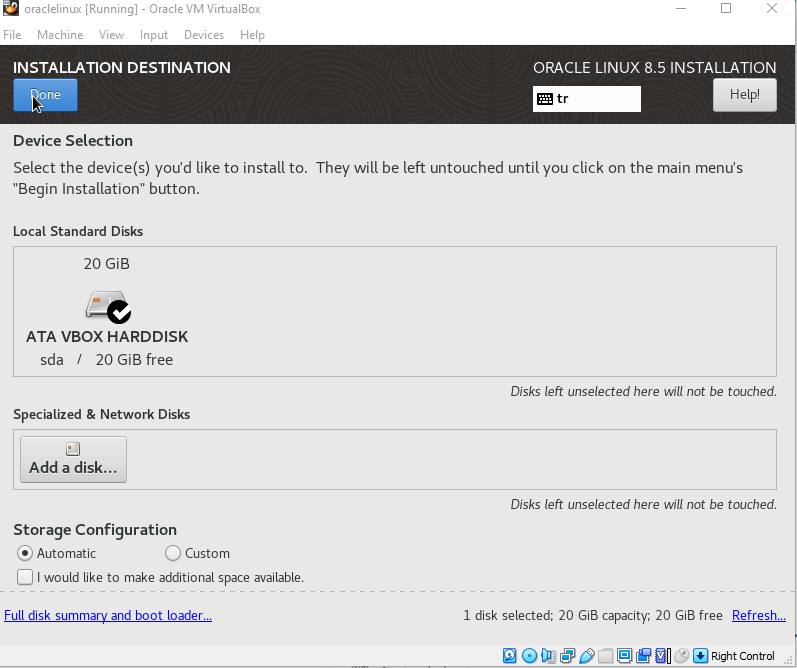
If you want custom storage configuration, please attention below list;
- /boot — 1 GB with xfs filesystem
- / — 8 GB with xfs filesystem
- /home — 7 GB with xfs filesystem
- /var — 2 GB with xfs filesystem
- Swap — 4 GB with swap filesystem
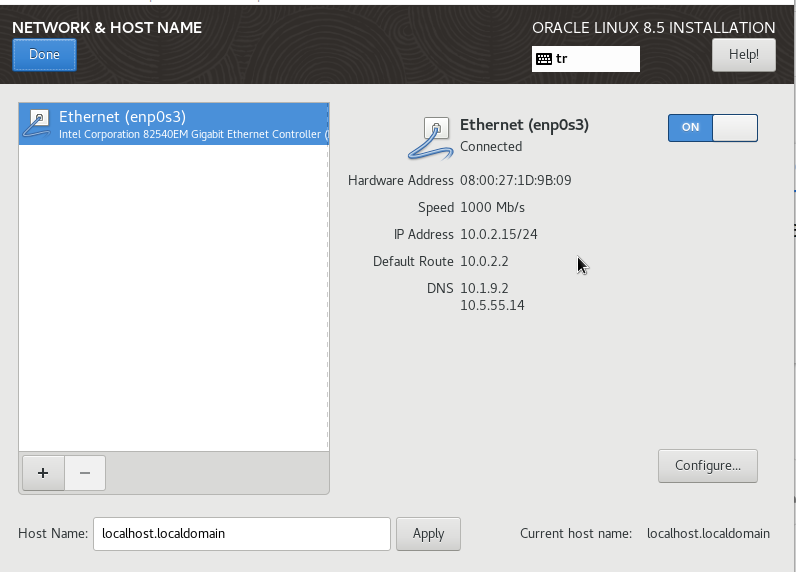
Network settings are made in the Network & Hostname section. The hostname is set.
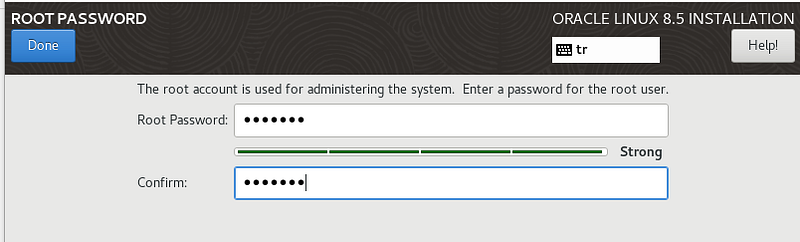
root password set
The installation starts. When the installation is completed, the machine is restarted by clicking the Reboot button.
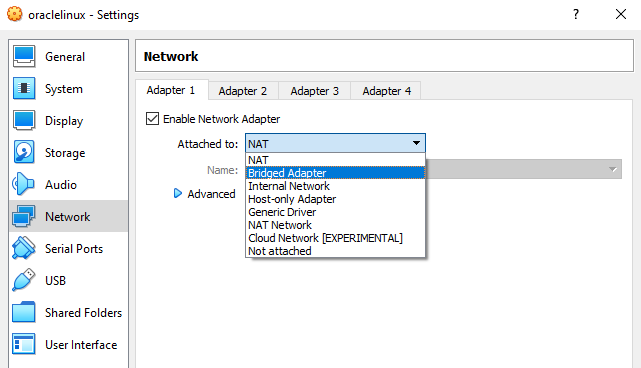
Finally, root and password are entered to connect to the virtual machine. Thanks to the ifconfig command, the ip address of the machine is visible. If there is a problem with your IP address, close the virtual machine completely and click on the network from the separate parts of the machine, then Bridged adapter is clicked instead of NAD as below and the virtual machine is turned on again.
If you want, you can connect to the virtual machine with mobaXterm, click sessions with mobaXterm, select ssh, enter your own IP address, and then connect to your virtual machine with your root and password.
